Ads 468x60px

Thursday, 23 November 2017

How to Migrate All Your Data From Chrome to Firefox

If you’re thinking about switching to Firefox Quantum—or at least trying to switch—Firefox makes it pretty easy. Firefox can import your bookmarks, saved passwords, browser history, and cookies directly from Google Chrome.
It can also import this data from Microsoft Edge or Internet Explorer, if you use those instead.

Migrate Your Bookmarks, Passwords, History, and Cookies


To access the Bookmarks Manager, either click the Library icon on the toolbar and click Bookmarks > Show All Bookmarks, or press Ctrl+Shift+B.Firefox normally prompts you to import data the first time you install it. However, if you had Firefox installed previously and now want to import data, you’ll need to launch the tool manually. The Import Browser Data tool is a little hidden—it’s under the Bookmarks Manager window.
Click the “Import and Backup” button on the toolbar and select “Import Data From Another Browser”. (If you just want to import bookmarks you’ve exported from Chrome or another browser as an HTML file, you can also just click “Import Bookmarks from HTML” here and then select the HTML file.)
Select “Chrome” in the Import Wizard and click “Next” to import data from Google Chrome. Ensure all Google Chrome browser windows are closed before you continue with the process.
You’ll be prompted to choose which data you want to import. If you’ve set up multiple Chrome browser profiles, you’ll first be asked which profile you want to import data from.
By default, Firefox will import Chrome’s Cookies, Browsing History, Saved Passwords, and Bookmarks. You can uncheck any of these options to only import some types of data.
Firefox will import the data and say it was imported successfully. Chrome’s bookmarks will be placed in “From Chrome” folders in your bookmarks menu and toolbar, but you can reorganize them however you like.

Download Your Add-ons

Firefox can’t import other data you may consider crucial, like your add-ons. You’ll have to hunt down equivalent extensions in the Firefox Add-ons gallery yourself.
If you use a popular add-on from a big company, there’s a good chance there’s a version of the extension for Chrome made by the same developer. Smaller, independent extensions may not be available for both browsers, but you’ll probably find an add-on that can do something similar.

Sync Your Firefox Browser Data Between Computers

Firefox has its own browser sync feature that can keep your data in sync across multiple PCs, phones, and tablets. You can check your Firefox Sync settings by clicking menu > Options > Firefox Account. If you haven’t yet signed in with a Firefox account, you can create one from here to start syncing your data.
Sign in with the same Firefox account on all your devices and your data will be synced between them, just like with Chrome. Firefox syncs open tabs, history, bookmarks, logins, add-ons, and preferences. So, once you set up Firefox once, it will sync your preferences to all your other PCs.
You can get this same data on your phone or tablet, too. Firefox offers apps for Apple’s iPhone and iPad as well as Google’s Android. They provide a way to access your Firefox bookmarks, open tabs, saved passwords, and history on your mobile devices, too.
Thankfully, with Firefox Quantum, Firefox now uses Google as the default search engine once again. Yahoo! is no longer the default, so you don’t have to worry about changing that.

Wednesday, 22 November 2017

Uber tried to cover up a hack that hit 57 million customers by giving hackers $100000

uber-data-breach


Uber is in headlines once again—this time for concealing last year's data breach that exposed personal data of 57 million customers and drivers.

On Tuesday, Uber announced that the company suffered a massive data breach in October 2016 that exposed names, e-mail addresses and phone numbers of 57 million Uber riders and drivers along with driver license numbers of around 600,000 drivers.

However, instead of disclosing the breach, the company paid $100,000 in ransom to the two hackers who had access to the data in exchange for keeping the incident secret and deleting the information, according to a report published by Bloomberg.
Uber said none of its own systems were breached, rather two individuals outside the company inappropriately accessed and downloaded 57 million Uber riders' and drivers' data that was stored on a third-party cloud-based service.

The cyberattack exposed the names and driver license numbers of some 600,000 drivers in the United States, and the names, emails, and mobile phone numbers of around 57 million Uber users worldwide, which included drivers as well.

However, the company said other personal details, such as trip location history, credit card numbers, bank account numbers, Social Security numbers or dates of birth, were not accessed in the attack.


Uber Hid 57 Million User Data Breach For Over a Year


According to Bloomberg report, former Uber CEO Travis Kalanick learned of the cyber attack in November 2016, when the company was negotiating with the Federal Trade Commission (FTC) on a privacy settlement.

So, the company chose to pay the two hackers $100,000 to delete the stolen information and keep quiet about the incident and finally agreed to the FTC settlement three months ago, without admitting any wrongdoing.

Uber Technologies Inc. only told the FTC about the October 2016 data incident on Tuesday, when the breach was made public by Bloomberg.

However, this secret payment eventually cost Uber security executives their jobs for handling the incident.

Now Uber CEO Dara Khosrowshahi has reportedly asked for the resignation of Uber Chief Security Officer Joe Sullivan, and one of his deputies, Craig Clark, who worked to keep the attack quiet.
"None of this should have happened, and I will not make excuses for it. While I cannot erase the past, I can commit on behalf of every Uber employee that we will learn from our mistakes," Khosrowshahi said. 
"We are changing the way we do business, putting integrity at the core of every decision we make and working hard to earn the trust of our customers."

Uber is notifying regulatory authorities and offering affected drivers free credit monitoring and identity theft protection.

The company also says that it is monitoring the affected accounts for fraudulent activity and that riders do not need to take any action against this incident. It's likely that Uber will be forcing its customers to reset their passwords for its app.

Thursday, 16 November 2017

How to Get Windows 10’s Fall Creators Update Now

Microsoft has started rolling out Windows 10’s Fall Creators Update, but it will be a few months before every PC gets it. If you don’t want to wait, you can download the Fall Creators Update from Microsoft right now.

A Warning About Upgrading Early

If you choose to skip the orderly roll out, you may encounter problems with the Windows 10 operating system on your PC’s hardware. You’re installing a stable operating system, so it’s much less risky than joining the Insider Preview program and using an unstable version of Windows. However, there is a risk you could encounter bugs or other issues on your PC.It can be annoying waiting months for a big Windows 10 update to reach your PC, but there’s a reason for the delay. Microsoft normally ensures the update works on your PC’s hardware and won’t cause any problems before offering it to you via Windows Update. If there seems to be a problem on some PCs, Microsoft can pause the update for those PCs and work on fix before continuing it.
Be sure you understand and accept these risks before opting into an early upgrade.

Use Microsoft’s Update Assistant

Microsoft offers an Update Assistant tool whenever it releases one of these big Windows 10 updates. You can download this tool to manually opt into the Fall Creators Update, even if Microsoft hasn’t pushed it to your device yet. Microsoft notes that this tool is for advanced users using an officially licensed, or “genuine“, version of Windows 10.
Head to the Download Windows 10 page and click the “Update now” button to download the Update Assistant. Run it and you’ll be told your PC is not running the latest version of Windows 10.
This dialog is a little unclear if you’re not familiar with Windows 10’s build numbers. If you’re using the Creators Update, you’ll be told your PC is running “version 15063”. The tool will offer to upgrade you to version 16299, which is the final stable version of the Fall Creators Update.
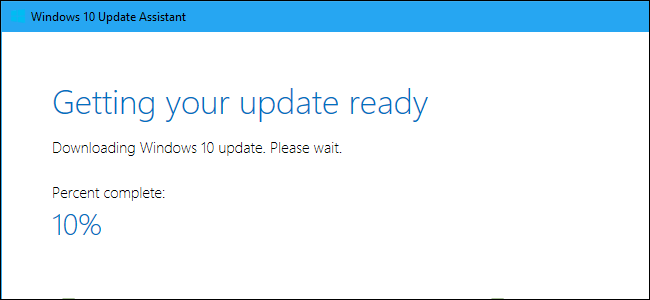
Click “Update Now” and the Update Assistant will download and install the Fall Creators Update for you. You can continue using your PC normally and even minimize the window, if you like. It will remain running in the notification area while it downloads the update.

How to Downgrade If You Have a Problem

You can only downgrade within the first ten days. You also won’t be able to downgrade if you delete the Windows.old folder or use a software program that deletes it for you, like Disk Cleanup. After ten days, Windows automatically removes the Windows.old folder to free up space, so you won’t have the option of downgrading without reinstalling Windows.If there is a problem, you can roll back to the previous version of Windows 10 you had installed. Just head to Settings > Update & security > Recovery and click the “Get started” button under “Go back to the previous version of Windows 10”.
Once you’ve downgraded, just wait until Microsoft offers you the update via Windows Update. The problem should be fixed by the time your PC receives the update normally.

Get Early Updates Next Time with the Insider Previews


If, however, you want to get updates earlier next time, you can enable Insider Previews to get a pre-release look at these features. The “Release Preview” track of Windows 10, in particular, is pretty great, since it’s much more stable than the Fast and Slow rings, and will get you new updates without having to wait for the roll out. It’s still technically an Insider Preview—one that keeps you on the stable build of Windows 10 but gives you Windows updates, driver updates, and Microsoft app updates early—so download at your own risk. But in our experience, the Release Preview is a relatively stable track with quick updates, which is great.If you’re running an Insider Preview build of Windows 10, now is a good time to leave the Insider Builds behind. If you stay on the “Fast Ring”, Microsoft will soon begin pushing you very unstable versions of the next Windows 10 update. You may want to switch to the “Slow Ring”, “Release Preview”, or even leave Insider Preview builds behind for now and use the stable version of the Creators Update. Head to Settings > Update & Security > Windows Insider Program on the Fall Creators Update to choose your Insider Preview settings.

Saturday, 8 April 2017

How to install PyCharm IDE by JetBrains for Python ( free community edition ) in Ubuntu

Hello guyz..

The official installation instructions :-
  • Copy the pycharm-*.tar.gz to an empty directory
    (make sure you have rw permissions for that directory)
  • Unpack the pycharm-*.tar.gz using the following command:
    tar xfz pycharm-*.tar.gz
  • Remove the pycharm-*.tar.gz to save disk space (optional)
  • Run pycharm.sh from the bin subdirectory
NOTE: PyCharm on Linux doesn't need special installation or running any installation script. It runs out of the pycharm-*.tar.gz

But there is already a version of PyCharm Community Edition available through the unofficial GetDeb repository :-


This does not only provide easier installation, but also automatic package updates.
You can simply add this repository to your configuration and install PyCharm from the terminal
(Ctrl+Alt+T) by executing the following four commands:
  1. Configure the repository (your correct Ubuntu release name gets inserted automatically):
    echo "deb http://archive.getdeb.net/ubuntu $(lsb_release -cs)-getdeb apps" | sudo tee /etc/apt/sources.list.d/getdeb-apps.list
  2. Retrieve and add the repository's signature key:
    wget -q -O- http://archive.getdeb.net/getdeb-archive.key | sudo apt-key add -
  3. Update your package lists:
    sudo apt-get update
  4. Install PyCharm:
    sudo apt-get install pycharm

Saturday, 4 February 2017

How To Remove Jio 1GB Limit Trick to Get Unlimited Internet (100% Working Trick)

What is Jio 1GB Limit:

In case if you are a new jio user let me warn you on one point, although jio claimed that they are giving unlimited internet but the daily 4G internet is reduced to jio 1gb limit. Which means you won’t get 4G speed after 1GB. Same problem with preview offer, all the remaining offers are completely free like unlimited voice calls and messages. Jio claims that more than 80% users are using less than 1GB data. So with this less cap, we can get the high-speed connection.

Steps to Bypass Jio 1GB Daily Limit Trick:

  • First, visit myjio application and then Open myjio app to check your present balance.
  • Then close the application and visit your mobile settings option
  • After that go to time & Date option and change the date to next 2 days
  • Now visit myjio app it will show your balance is Zero
  • But don’t worry you can use unlimited data without any limitations
if you are confused about changing the date, here is one example. Today’s date is 4th Feb, change the date to Feb 5th and then visit myjio app to check the data. It will show zero balance but you can use unlimited data.

Steps to remove Jio 1GB limit per day:

  • Visit APN Settings and set protocol as ipv4/ipv6
  • Open UC browser and download few items till the data reaches 100 MB
  • This will give you one warning and your internet speed will go down
  • Now just resume the downloads if it works keep on going
  • Change the protocol to ipv6, now turn on jio internet and just do browsing
  • Browse till 50-60 MB then restart the mobile
  • Repeat the same process to use 6-8 MB
  • Then again change the protocol to ipv4/ipv6

Friday, 3 February 2017

How to Assign a Static IP Address in Windows 7, 8, 10


When organizing your home network it’s easier to assign each computer it’s own IP address than using DHCP. Here we will take a look at doing it in XP, Vista, Windows 7, Windows 8.x, and Windows 10.

If you have a home network with several computes and devices, it’s a good idea to assign each of them a specific address. If you use DHCP (Dynamic Host Configuration Protocol), each computer will request and be assigned an address every time it’s booted up. When you have to do troubleshooting on your network, it’s annoying going to each machine to figure out what IP they have.

Using Static IPs prevents address conflicts between devices and allows you to manage them more easily. Assigning IPs to Windows is essentially the same process, but getting to where you need to be varies between each version.

Windows 7 or Windows 8.x or Windows 10

To change the computer’s IP address in Windows, type network and sharing into the Search box in the Start Menu and select Network and Sharing Center when it comes up. If you are in Windows 8.x it will be on the Start Screen itself, like the screenshot at the top of this article. If you’re in Windows 7 or 10 it’ll be in the start menu.

1start menu

Then when the Network and Sharing Center opens, click on Change adapter settings. This will be the same on Windows 7 or 8.x or 10.

2adapter

Right-click on your local adapter and select Properties.

3local area connection

In the Local Area Connection Properties window highlight Internet Protocol Version 4 (TCP/IPv4) then click the Properties button.

4properties

Now select the radio button Use the following IP address and enter in the correct IP, Subnet mask, and Default gateway that corresponds with your network setup. Then enter your Preferred and Alternate DNS server addresses. Here we’re on a home network and using a simple Class C network configuration and Google DNS.

Check Validate settings upon exit so Windows can find any problems with the addresses you entered. When you’re finished click OK.

5entersettings

Now close out of the Local Area Connections Properties window.

6closeoutof

Windows will run network diagnostics and verify the connection is good. Here we had no problems with it, but if you did, you could run the network troubleshooting wizard.

7verify

Now you can open the command prompt and do an ipconfig  to see the network adapter settings have been successfully changed.

8verify

Wednesday, 27 January 2016

How to Unlock Your Android Phone’s Bootloader, the Official Way

17517955832_c64235ce83_b
Unlocking your Android phone’s bootloader is the first step to rooting and flashing custom ROMs. And, contrary to popular belief, it’s actually fully supported on many phones. Here’s how to unlock your bootloader the official way.

Not Every Phone Will Let You Do This

There are two kinds of phones in this world: Those that let you unlock your bootloader, and those that don’t.
Whether you’re allowed to unlock your bootloader depends on the manufacturer of your phone, the model you have, and even your carrier. Nexus phones are all unlockable by nature, and many phones from Motorola and HTC allow you to unlock your bootloader through a similar process as the Nexus.
Other phones, however–and some carriers–don’t allow you to unlock your bootloader the official way, which means you have to wait for developers to exploit a security vulnerability if you want to root and flash ROMs. If you have one of those phones, this guide will sadly not help you.
The best way to find out which category your phone falls into is to browse its section at XDA Developers. If you have an HTC or Motorola phone, you may be able too research its unlockability on HTC or Motorola’s website. If it doesn’t support unlocking, you’ll have to use an unofficial unlocking or rooting method, which you’ll usually find on the XDA Developers forums.
If your phone does support unlocking through more official channels, read on.

Step Zero: Back Up Anything You Want to Keep

Before we begin, it’s important to mention: this process will erase all of your data. So if you have any photos or other files on your phone that you want to keep, transfer them to your computer now. In addition, if you have any app settings you want to keep, use their backup function to create a backup settings file, and transfer those to your computer as well.
Here’s an extra tip: Since I know I’m eventually going to root my phone, I always unlock my bootloader as soon as I buy a new device. That way, I don’t waste time setting it up only to erase the phone in a few days and do it all over again. If you’re an obsessive Android tweaker who knows you’re going to root soon, consider unlocking before you go through the trouble of setting up your phone.
When you’ve backed up everything you want to keep, continue with the steps below.

Step One: Install the Android SDK and Your Phone’s Drivers

screenshot.1

Now you’ll need two things for this process: the Android Debug Bridge, which is a command line tool for your computer that lets you interface with your phone, and your phone’s USB drivers. Even if you’ve installed these before, you should get the latest versions now.
  1. Head to the Android SDK download page and scroll down to “SDK Tools Only”. Download the ZIP file for your platform and unzip it wherever you want to store the ADB files.
  2. Start the SDK Manager and deselect everything except “Android SDK Platform-tools”. If you are using a Nexus phone, you can also select “Google USB Driver” to download Google’s drivers.
  3. After it’s finished installing, you can close the SDK manager.
  4. Install the USB drivers for your phone. You can find these on your phone manufacturer’s website (e.g. Motorola or HTC). If you have a Nexus, you can install the Google drivers you downloaded in step 2.
  5. Reboot your computer if prompted.
Turn on your phone and plug it into your computer using a USB cable. Open the platform-tools folder in your Android SDK folder and Shift+Right Click on an empty area. Choose “Open a Command Prompt Here”, and run the following command:
adb devices
If it shows a serial number, your device is recognized and you can continue with the process. Otherwise, ensure you’ve performed the above steps correctly.

Step Two: Enable USB Debugging

usb_debuggingNext, you’ll need to enable a few options on your phone. Open your phone’s app drawer, tap the Settings icon, and select “About Phone”. Scroll all the way down and tap the “Build Number” item seven times. You should get a message saying you are now a developer.
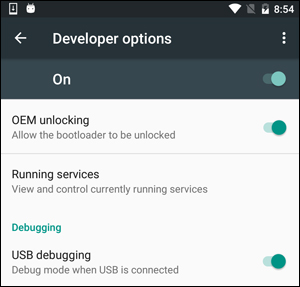
Head back to the main Settings page, and you should see a new option near the bottom called “Developer Options”. Open that, and enable “OEM Unlocking”, if the option exists (if it doesn’t, no worries–it’s only necessary on some phones).
Next, enable “USB Debugging”. Enter your password or PIN when prompted, if applicable.
Once that’s done, connect your phone to your computer. You should see a popup entitled “Allow USB Debugging?” on your phone. Check the “Always allow from this computer” box and tap OK.

Step Three: Get an Unlock Key (for Non-Nexus Phones)

If you’re using a Nexus device, you can skip the following step. Non-Nexus devices will likely need to go through one extra step before you continue.
Head to your manufacturer’s bootloader unlocking page (for example, this page for Motorola phones or this page for HTC phones), choose your device (if prompted), and log in or create an account.
unlock_page
The rest of this step is a bit different depending on your phone, but the manufacturer’s site should walk you through the process. It will go something like this: First, turn off your phone and boot into fastboot mode. This is a bit different on every phone, but on most modern devices, you can get there by holding the “Power” and “Volume Down” buttons for 10 seconds. Release them, and you should be in fastboot mode. (HTC users will need to select “Fastboot” with the Volume Down key and press power to select it first.) You can usually find more information on your specific phone with a quick Google search, so feel free to do that now before continuing.
2016-01-21 15.03.50
Connect your phone to your PC with a USB cable. Your phone should indicate that the device is connected. On your computer, open the platform-tools folder in your Android SDK folder and Shift+Right Click on an empty area. Choose “Open a Command Prompt Here”, and use that Command Prompt window to retrieve your unlock key as described by your manufacturer. (For example, Motorola phones will run the fastboot oem get_unlock_data command, while HTC phones will run the fastboot oem get_identifier_token command.)
unlock_data
The Command Prompt will spit out a token in the form of a very long string of characters. Select it, copy it, and paste it into the applicable box on your manufacturer’s website–make sure there are no spaces!–and submit the form. If your device is unlockable, you’ll receive an email with a key or file that you’ll use in the next step.
If your device is not unlockable, you’ll get a message stating so. If you want to root your device or flash a ROM, you’ll need to use a more unofficial method, which you can usually find on a site like XDA Developers.

Step Four: Unlock Your Phone

Now you’re ready to actually perform the unlock. If your phone is still in fastboot mode, run the command below. If not, turn off your phone and hold the “Power” and “Volume Down” buttons for 10 seconds. Release them, and you should be in fastboot mode. (HTC users will need to select “Fastboot” with the Volume Down key and press power to select it first.) Connect your phone to your PC with a USB cable.
On your computer, open the platform-tools folder in your Android SDK folder and Shift+Right Click on an empty area. Choose “Open a Command Prompt Here”.
To unlock your device, you’ll need to run one simple command. For most Nexus devices, this command is:
fastboot oem unlock
If you have a newer Nexus, such as the Nexus 5X or 6P, the command will be slightly different:
fastboot flashing unlock
If you have a non-Nexus device, your manufacturer will tell you what command to run. Motorola devices, for example, need to run fastboot oem unlock UNIQUE_KEY, using the unique key from the email you received. HTC devices will run fastboot oem unlocktoken Unlock_code.bin using the Unlock_code.bin file you received from HTC.
After running the command, your phone may ask if you are sure you want to unlock. Use the volume keys to confirm.
fastbootunlock
When you’re finished, use the on-screen menu to reboot your phone (or run the fastboot reboot command from your PC). If everything worked correctly, you should see a new message at boot stating that your bootloader is unlocked, and after a few seconds it should boot into Android. It’s important that you boot into Android before doing anything else, like flashing a custom recovery.
Congratulations on unlocking your phone !!

Fileice Latest Survey Bypassing Trick | 100% Confirmed Working [ January - February 2016 ]


Hello Folks !! Today We Are Again Back With One Of The Most Demanded Trick On Internet That Is Fileice Survey Bypassing Trick ! . As We All Know Old Fileice Tricks Were Banned So We Worked Hard And After A long Research We Have Find A New Way To Complete Fileice Surveys Easily And Yes Its Working . We Are First To Post Fileice Survey Bypassing Trick In 2016!!
Requirements :

  • Indian Ip
  • Pc / Mobile
  • Internet Connection 
  • Browser
  • Brain :p
Note :

  • Only applicable For Indian Users!
  • Clear Cahe And Cookies Every Time .
  • You Can Also Use Your Friend's/Relatives/Neighbour Mobile No. For Survey Purpose

How To Easily Bypass Fileice Surveys In 2 Minutes ?

  • First To All Clear Your Browser Cookies And Cahe
  • After That Switch To " Private Mode "
  • Now Go To Fileice Survey Page And Choose This Survey " Get Rs 2700 In Coupons From AmericanSwan " !
 
  • After That You Will Be Redirected To A Page
  • Fill The Form " Email , Password , Gender And Your Mobile No "
  • For Email You Can Use " Fakemailgenerator.com "
  • After That Click On Men/Women ( Depends On You :p )
  • Soon You Will Receive A OTP On Your Registered Mobile No.
  • Now Just Input That OTP Number On The " Pop UP Page "
 
  • Click On Confirm !!
  •  Yay!! Your File Has Been Unlocked :D


Enjoy Guys!! Keep Visiting..

Tuesday, 26 January 2016

[Askmebazaar Loot] Strontium 32GB Class 10 Memory Card @524 Rs Only or Upto 100% Discount

Buy Strontium 32GB Class 10 Memory Card for just 524 Rs Only worth rs 899 rs. Market value of this product is approx 899 rs, but buy this product at just 524 rs from Paytm. So grab this deal now before it ends. This memory card is faster in speed in comparison to other memory cards, having class 10 which is faster memory card ever, deal valid for limited time only. Grab it now before it end.

Buy Strontium 32GB Class 10 Memory Card for Just 524 Rs from Paytm :-

  • Click on Buy now Button
  • Enter your Name, Mobile Number, Email Address, Shipping Address
  • Apply Below Promo Code for Get Extra Discount
Promo Code –  STORAGE10
  • Click on Confirm Order Button & Pay via Cash on Delivery !

Sunday, 27 December 2015

[Unlimited Loot] Get Upto 100% Discount On Products from Askmebazaar by Play Game

Hey Guys, Askmebazaar is offering upto 100% Discount on Products. This offer is live because of Christmas Special Sale, on which you have to play Simple Games and Get upto 100% Discount. You have to play simple game and try your luck, then you will get upto 100% Discount on Products. It’s Depend on your Luck, that how much discount you gonna get from this offer. So check it out now, from below and try your luck in this offer and get products upto 100% Discount.

How to Get Upto 100% Discount on Products from Askmebazaar :-

  • At First, Visit Askmebazaar Homepage from here – Offer Page
  • Now, Browse and Choose Any Product of your choice, which you are willing to buy
  • Now, In Product Page you will see a option of Play game and get upto 100% Discount option
Capture(373)
  • Then click on play game, and answer simple question
  • There you will see option for enter number and email, then enter otp code
  • after enter otp code, it will start game and you can get upto 100% discount, depend on your luck.
Main Trick Starts here

How to Get unlimited Chances of 16 GB Memory Card :-

  • Open Memory card link from here – Offer Page
  • Then , open viraldeals unlimited chances in memory card online script from here
Capture(374)
  • Enter your number and otp code in this script
  • you will get 3 chances to generate coupon, and if you  are not satisfied, then enter same number and otp again
  • Make sure you save coupon code, when you get higher discount.
  • maximum discount till now is 55% discount coupon

So Enjoy this awesome offer from askmebazaar. I hope you will like this post. keep visit here for get more deals like this. Thanks for visiting.

Wednesday, 16 December 2015

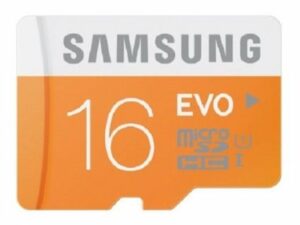
[Loot] Samsung 16GB Class 10 Memory Card @289rs from Amazon (Hurry)

Now, Buy Samsung 16GB Class 10 Memory Card @289rs from Amazon. Grab this offer now, before it ends. This offer is coming because of Storage Sale special on Amazon, in happy hours. They are offering big Discount on Storage devices like Memory Cards & Memory Cards etc. so i have selected best deal for you. Buy This product at Just 289rs rs from Amazon, worth rs 449.

Steps for Buy Samsung 16GB Class 10 Memory Card @289rs from Amazon

  • At First, Visit Product Page from here – Offer Page
More Memory Card Deals
  • Click On Buy Now Button & Proceed to checkout
  • Login or sign up with your Amazon Account
  • Select your delivery address & proceed to payments
  • pay via suitable payment method, & enjoy the deal.

Product Image


41PEKgJ7EoL._SX425_

Specification

  • Compact Design for Maximum Portability.
  • Store more with capacities up to 16gb 5-year limited warranty.
  • High-Capacity Drive Accommodates Your Favorite Media Files
  • Samsung SecureAccess Software Protects Drive from Unauthorized Access
  • The models are different because production is from different countries. Otherwise both are Samsung  cruzer blade models.
Price Comparison
Price: 499.00
Sale: 340.00
Deal Price: 289.00
Cash on Delivery eligible.
You Save:
260.00 (47%)
for recharges. keep visit here for get more deals like this. Thanks for visiting.

[Loot] Sandisk Cruzer 16GB Pen Drive @79 rs from Ebay – Registration Open Till 06:00 pm

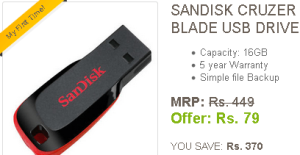
Are you a still new user of Ebay?, if yes then here is an awesome offer for you. Grab ebay 79 rs pendrive offer now,You can buy Sandisk Cruzer Blade USB Drive capacity of 16GB from Ebay, only if you are a new user of Ebay. This offer is valid only for limited time. Original selling price of this product is 449 rs, but this product is offering from Ebay for their new users at just 79 rs. At this price no shop keepers sells even 4GB pendrive, but here you are getting 16 Gb pendrive with 5 year warranty for just 79 rs from Snapdeal. Grab the deal now before it ends.

How to Get Coupon Code (Registration Open)

Registration Open Till 06:00 pm

Capture(48)

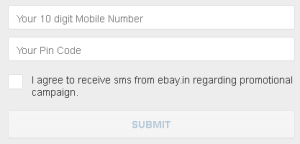
  • There you will see a form like screenshot below
Capture(46)
  • Enter your Mobile Number & Area Pincode here, & Tick on i agree
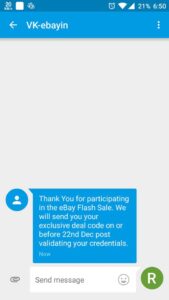
  • Then Click on Submit & you will get an Confirmation message
12395502_426132674242810_958009597_n
  • Also you will get an confirmation message from Ebay
  • You will get an Coupon Code & All instructions for Buy this pendrive at 79 rs from Ebay on or before 22nd December, 2015.

Get Sandisk Cruzer 16GB Pen Drive at Just 79 rs from Ebay for New Users

  • At First, Visit Product Page ( We will update link when available(
  • Then, Click on Buy Now Button & Buy The Product
  • At Next Page, Apply Coupon Code which you have Got Via SMS
Enjoy The Deal..

Terms & Conditions apply

  • If the user is not a First Time transactor on eBay, then he/she will not be eligible for this product
  • Manufacturer Warranty of 5 years is applicable on this product. Hence it will not be covered under eBay Guarantee.

Update – Promo Code will be sent to mobile Numbers at 22 Dec 2015.


^ Scroll to Top